So, I decided to make this my sticky post in this journal. Because otherwise I will forget it exists, and I will not update it. And it will need updating as I add more patterns.
( Abbreviations )
Shenanigans Skort
Sep. 26th, 2020 03:47 pmI finally got around to sewing the Shenanigans Skort from 5 out of 4 patterns. And I love it!
I made a size 3XL at the waist, going to 4XL at the hips, 7” inseam shorts, prudent length skirt with flounce. I did a medium rise shorts and skirts, and added two placket pockets to the shorts without flaps.
Overall, mighty comfortable, and long enough to wear to work, which is a plus. Not that we are planning to go back to the office any time soon. I made the shorts and the flounder in the same fabric, and the skirt and waistband in a different one - a lovely gaming fabric.
Things I’ll do differently next time:
- Low rise for both shorts and skirt, so that it sits below my tummy.
- Longer shorts. 7” is just barely enough for me, as I need the shorts to avoid chaffing. Probably 10” would be better.
- Put the pockets in from the start, rather than figure out later on that I really, really want to have pockets
- Maybe add some pockets on the side seams of the skirts. They may need to be suspended from the waistband to avoid them rattling around.
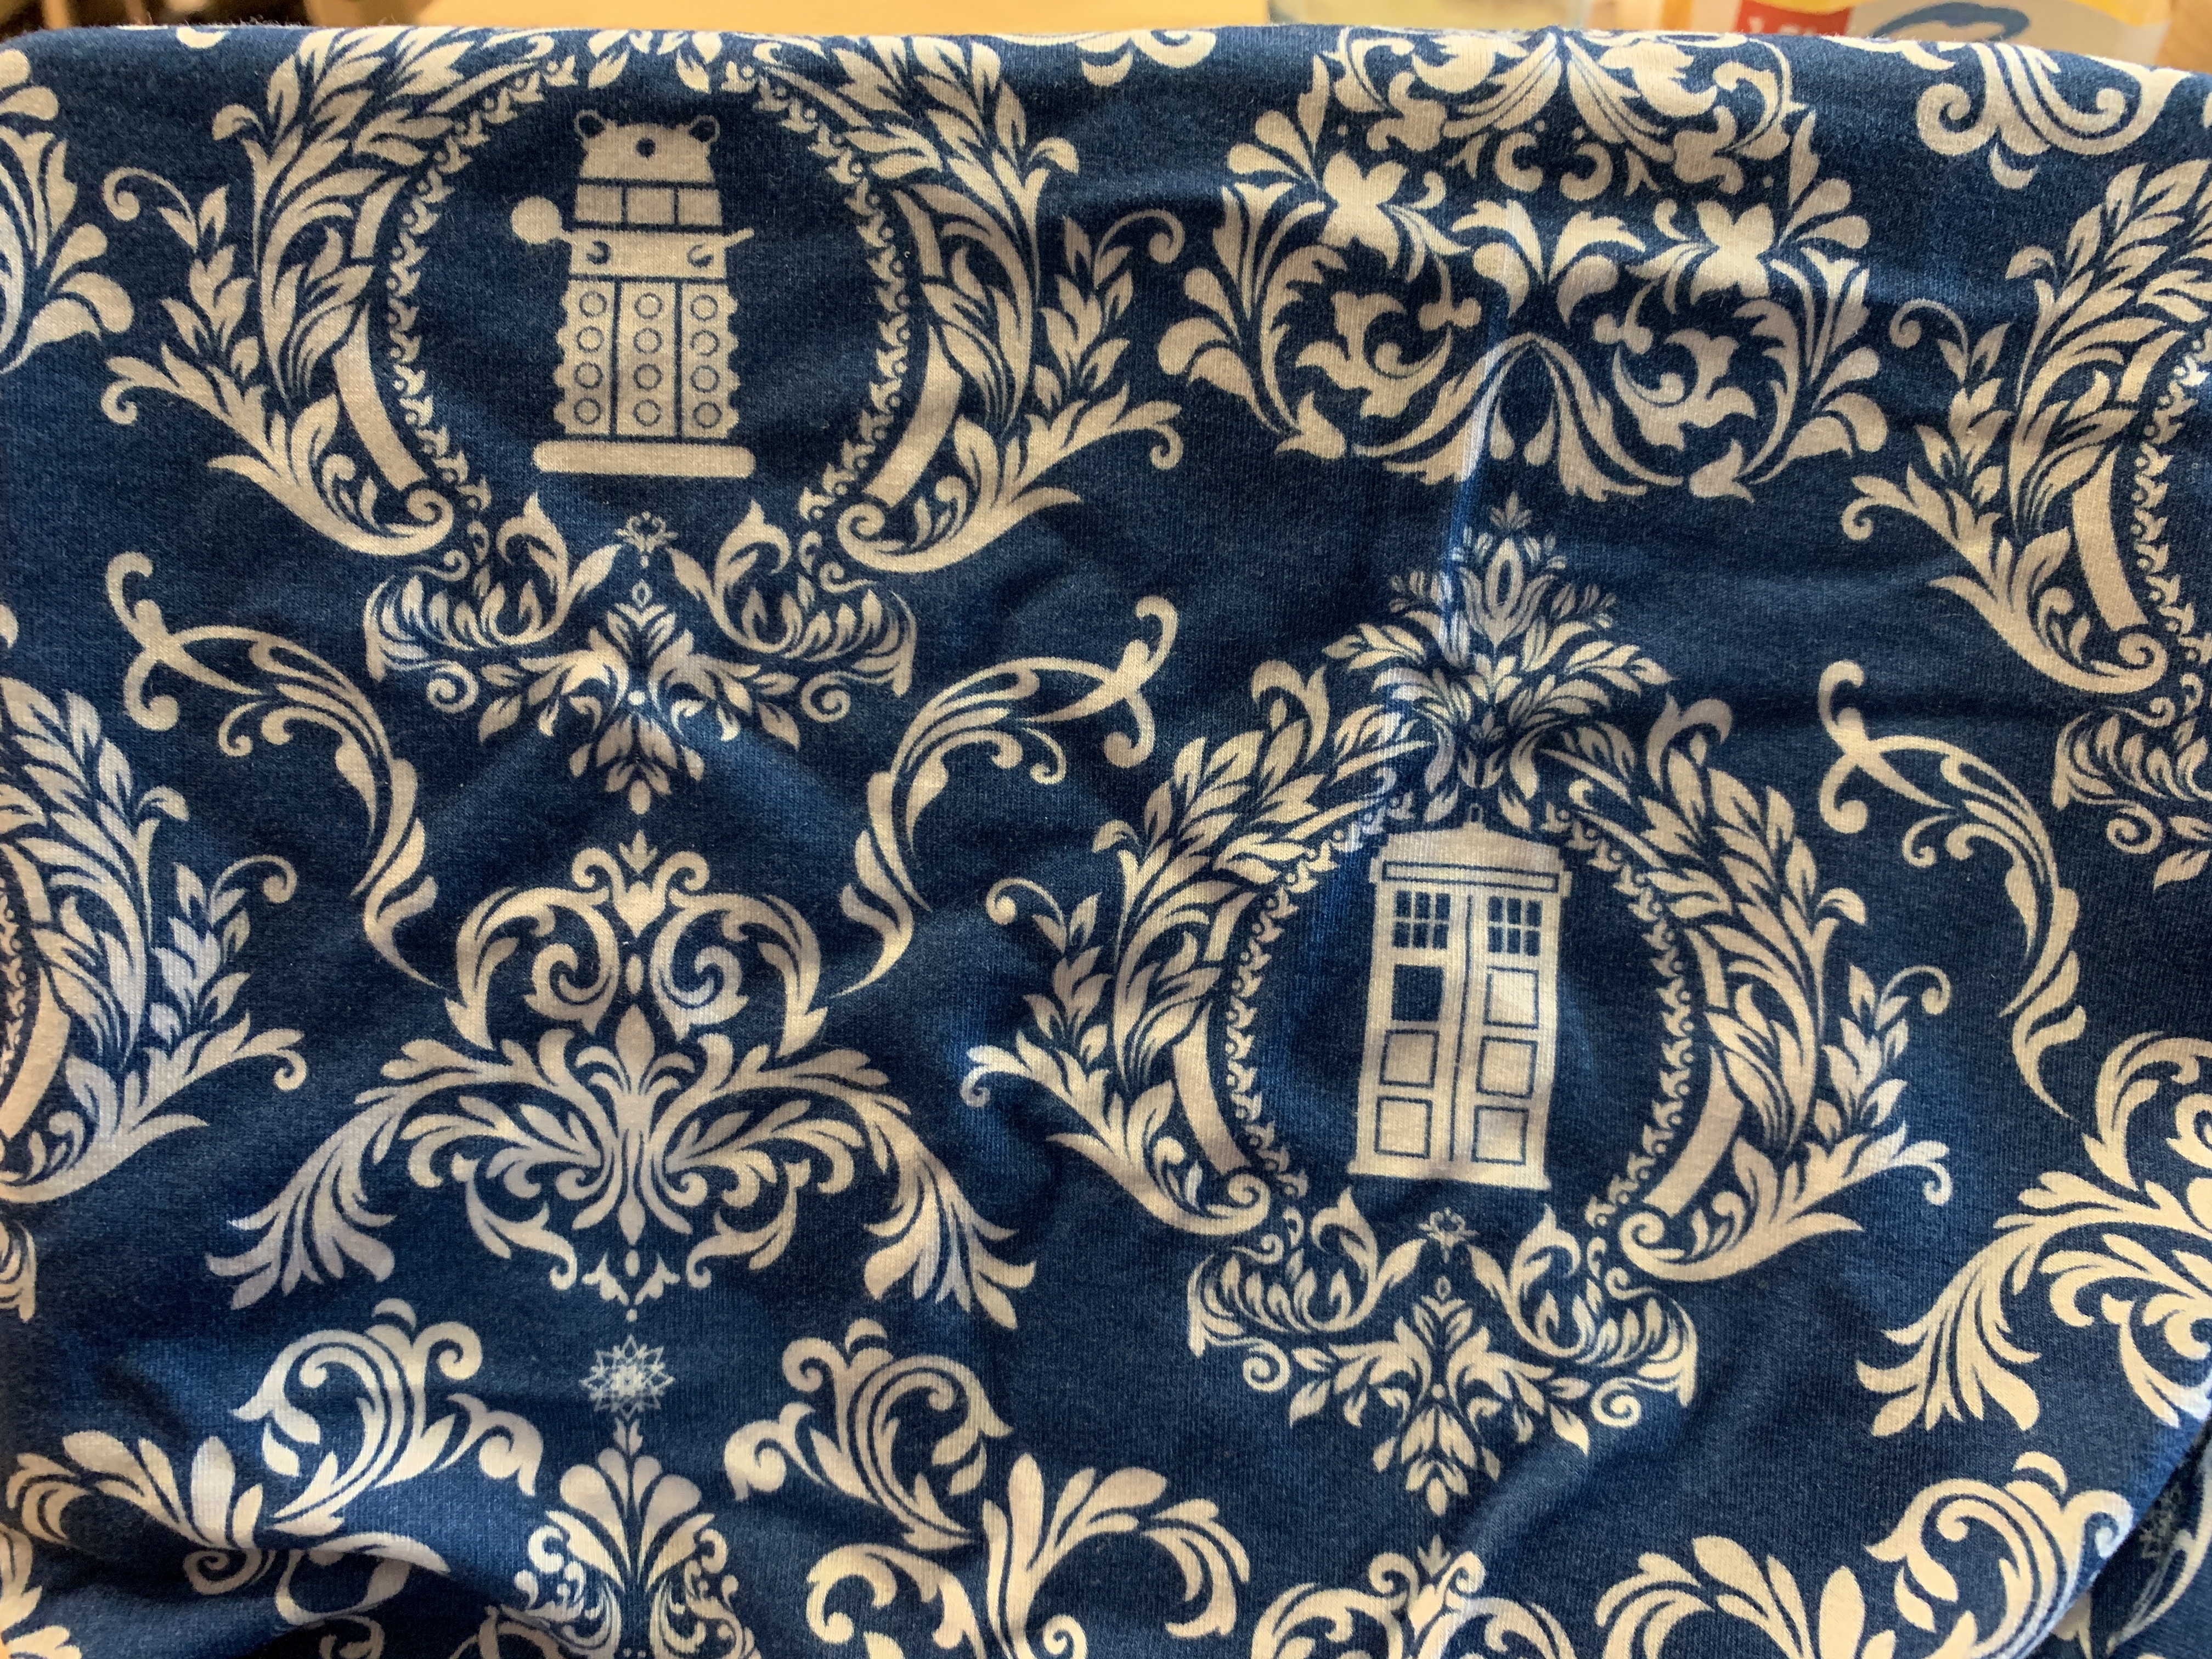
So, I recently discovered 42 Custom Fabrics, and have been drooling over their wonderful fabrics for quite a while. Eventually I caved in and got a metre of their lovely Doctor Who Christmas fabric. And just for a bit of variety, I ordered bamboo Lycra, instead of cotton Lycra.

When it arrived, I was very impressed with the fabric, and also very terrified. It’s slinky! It’s slippery! It’s drapey! It’s all the things I struggle to sew, more or less. So I put it aside and waited for a nice pattern to appear...
Enter the Ellie And Mac Going Home Sweater. Perfect for colour blocking, being a raglan. So I thought I’d make the front and back with the Doctor Who fabric, and then find something to coordinate with it. So I found a plain dark grey bamboo Lycra (I’m *not* using white for clothes for me. Ever. No, nay never!), and got a meter of that.
I made the tunic lenght, long sleeves with cuffs, neckband version (didnt’ have enough fabric for the cowl). Size 3XL.
The fabric was wonderful to work with, despite my initial misgivings about it. It stayed in place, didn’t slither around, and looks amazing when it drapes. The pattern is very easy to follow, and the assembly itself is very simple. I had my usual problems with bands - they take a long time, and never look exactly spread over the neckline / hem, but they look good enough.
Having a serger did speed things up, once I remembered how to use it without it running away from me. I still need more practice with serging bands - mostly because my starts / ends are not very good. But from the outside, the thing looks really good.
Sleeves are a bit long on me, but I love sleeves like that. The body is longer than I was expecting it to be, but that’s not a problem either - I do like long shirts so that my lower back doesn’t get cold.
Photos to come!
Mother Grimm’s Beltaine tunic
Sep. 19th, 2018 02:44 pm I love this pattern! And I love the sizing that Mother Grimm uses: I’m in between sizes Peridot at the top, and Moonstone from the waist down. So I graded between them, with no changes to the waistlines, which makes it easier.
I made it without the bodice/skirt seam or waistband piece. I used a blue camouflage knit fabric, so I thought that’d make it look neater. I made the hanky hem, with pockets - of course with pockets!
The pattern is pretty detailed, and easy to follow. It took a few hours to complete, because every seam requires a straight seam and a zigzag edging when you haven’t got a serger. Probably the most complicated thing is sewing the seams that involve the pockets - basting is useful.
So far I’ve worn it a couple of times - with jeans, because it’s gettting a bit too cold to wear it with leggins, although it would work well with them too. If I make it again, I may make the pockets a bit shallower - when I put my phone in them, it falls to the very very bottom, and then it does take a while to fish it out. Also, the opening for the pockets could do with being a bit larger.
I think I’ll make another one, with the curved hem, just to see the difference.
Hallå envelope tee
Aug. 4th, 2018 08:01 pm I had this wonderful 1m of cotton Lycra in a zebra pattern. It may seem like an odd choice, zebras. But you see, I have Joint Hypermobility Syndrome (never heard of it? There’s a lot of info on it here). Those of us with it often refer to ourselves as zebras, because of the old adage “if you hear hooves, think horses, not zebras” - we tend to baffle medical professionals for years, who think all our symtoms are not related to each other, until someone eventually puts it all together and figures out we are not suffering from the usual suspects (horses), so it may be something weird (zebras).
Anyway, I was wondering what I could manage to do with just one metre of fabric, when I’m usually a large size. Enter the Hallå envelope tee, which looks amazing when using a panel for the front, for example. So I figured I could use the zebra fabric on the front, with a solid colour for the back, bands, and sleeves.
Sizewise, I am between the 24 and 26 - I ended up cutting a 24 you, graded to a 26 at the waist and hips.
Good news is, I managed to cut two fronts (one for hemming, one for banding) and one set of short sleeves from the zebras. I then manage to cut two backs, all front and back neckbands, the waistband for the banding front/back and another set of short sleeves.
Bad news is, I cut them upside down, so the zebras will have their hooves in the air. Oh well.
Overall, the instructions are easy to follow, although they are designed for serger. I also noticed a few things could be added to make the tee easier to make - such as “make sure that the tail of the neckband that is brought from the back to the front is tucked in the sleeve seam”, which I learnt by not doing just that in the first one.
I used lightning stitch for all the straight seams, and also for the topstitching of the bands to the front and back. I turned the hems twice, one with lightning stitch, the second with three step zigzag. I know I can leave edges exposed with knits, but I much prefer the fully encased ones. I did the three step zig zag when attaching the band to the bottom, in order to get more stretch - we’ll see whether that actually helps or hinders
I did hemmed sleeves on both shirts. The first one I did my usual way (side seam first, then hem the sleeve), which ensured that the hem would look neat even if things didn’t match up exactly. For the second, I followed the actual instructions in the pattern (hem first, then side seam), which lead to having to stretch things and not exactly match other seams to get things to mostly align. So, for the next set, I’ll be doing things my way...
From a quick try, I think I prefer the banded version, but the hemmed version also looks good. Sizewise, I think I got it right, and the lenght sits just where I like my tshirts (i.e. way below my trouser waistband!)
Photos will follow!
Stitch Upon a Time Calista bra
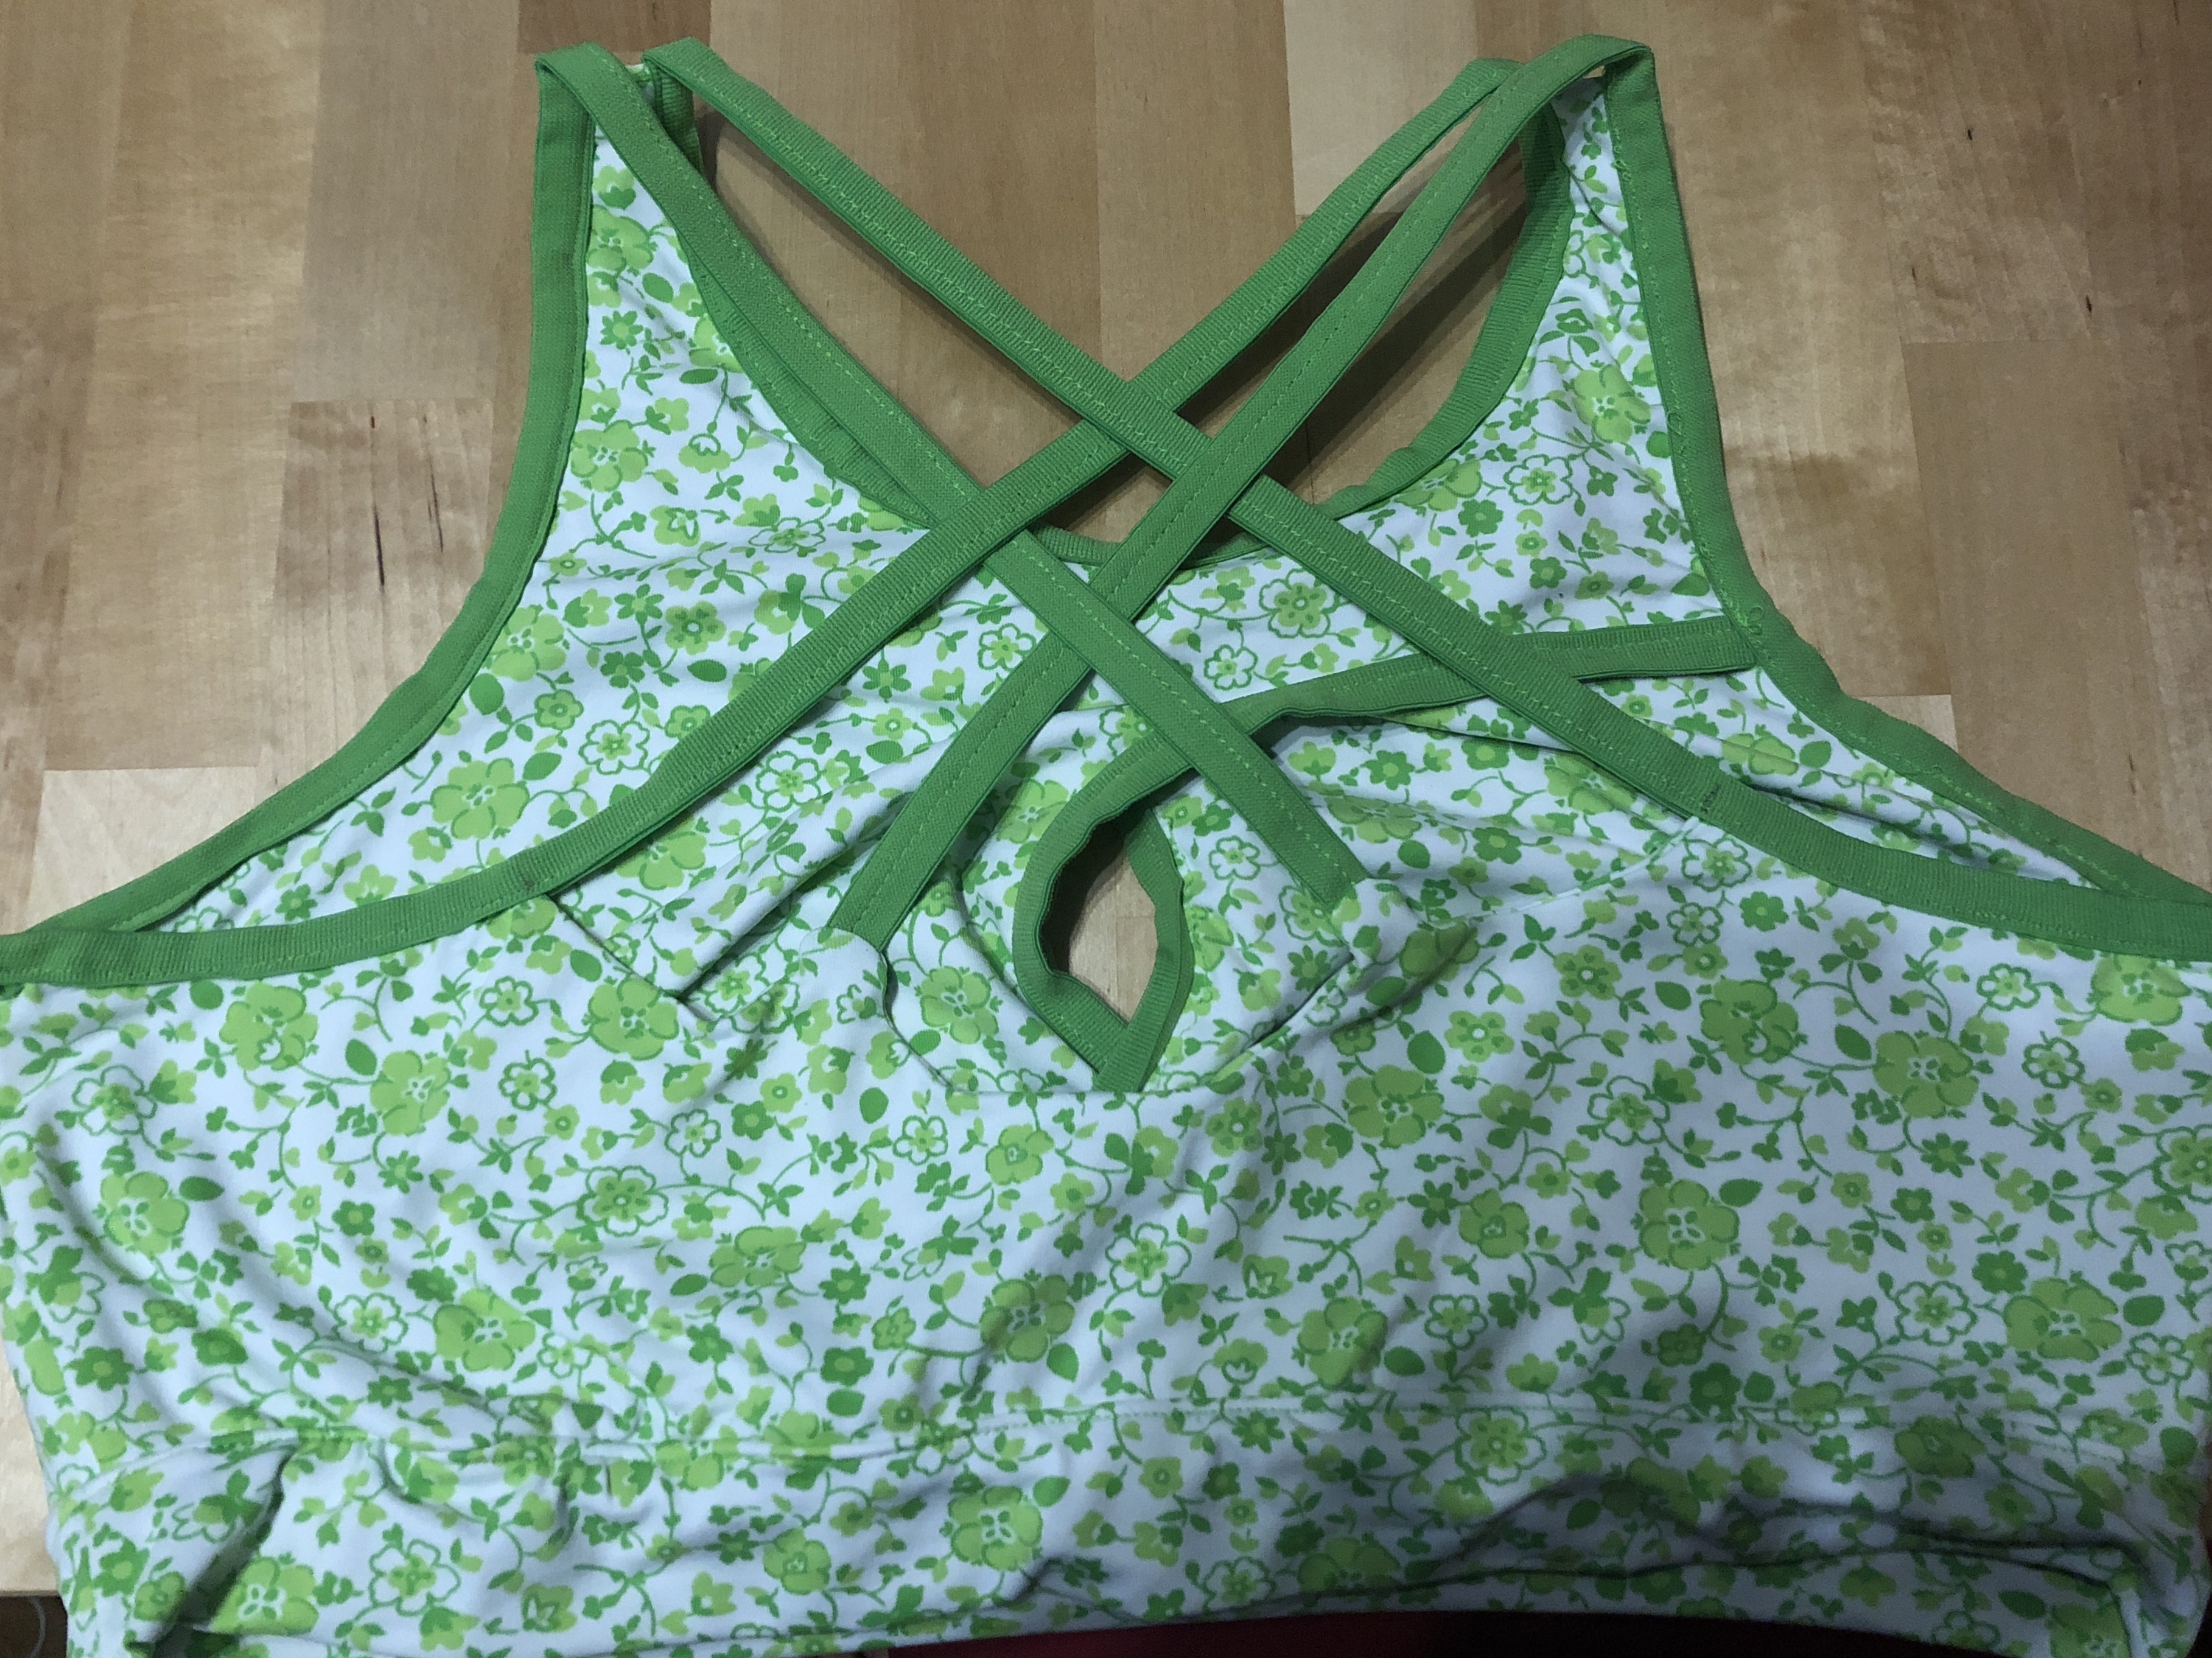
Aug. 3rd, 2018 09:34 pm I fell in love with the Calista bra/tshirt from Stitch Upon a Time. But, being somewhat on the large side, I wondered whether it would be supportive enough. So, I decided to schew my usual cotton jersey, and went with a cotton/Lycra mix with more Lycra than I would normally use. In a lovely white background / green shamrock pattern, with green foldover elastic.


According to measurements, I’m a size 2XL, so I went for that. I went for the purple line (for more than 4.5” difference between underbust and bust measurements) and for the full coverage line around the sides. I cut the strappy back, rather than the racer back option, because I usually struggle to get into racerbacks...
I cut both lining and outer from the same fabric - will make variations on future versions. And, as usual when cutting fabric, the mirror pieces weren’t exactly mirrored - probably just an eighth of an inch here and there, but enough to make it annoying to match them.
The making of the bra took about 4 episodes of Star Trek The Next Generation, so about 3 hours. The instructions, as usual, are very detailed and easy to follow. It would go much easier with a serger, but it’s very doable with a sewing machine and a stretch stitch. If I make it again, I may use a zig zag (probably a three step zig zag) to secure the foldover elastic. Which, by the way, was easier to attach than I was expecting after my previous experience with it.
The end result is good, but, as I suspected, there isn’t enough support for me. It’ll be good for wearing at home, and even to sleep in (I’d make a version with the tunic for that!), but it won’t do for a proper bra, and even less for wearing as a top... It’ll look good over my usual bras, though, although the strappy back would show the back of a bra (not that I care about that).
Worth noting that the point at which the pattern calls for trying it on to determine the length of the straps does not give a good idea of how the final item will fit - because it hasn’t got the foldover elastic on the underarms or the neckline yet.
I’m not sure about the bra band and the 1cm elastic added to it - I keep thinking there must be a simpler way to do that bit, preferably one that would result in the elastic being fully encased rather than just hidden behind the waistband, but I can’t see how to do that right now. For the time being, I’ve topstitched the band with the seam allowance towards the band to ensure the elastic stays hidden.
Suggestions for next variations:
- Make a straight strap back version. This would require printing the curved front again, as I cut that one for the strappy back. I could do the plain front, but I quite like the curved front, and I think it provides more support. I might make this one a tunic
- Use a stronger lining. Maybe add a layer of powernet sandwiched between the inner and outer. That won’t provide shaping, but it may offer more support.
- Add a bit of “seam allowance” to the bottom of the front and back, to have a larger seam allowance when attaching it to the band or tunic - this might make it easier to hide the 1cm elastic
Rebecca Page’s Arabella
Jul. 24th, 2018 09:33 pmSo, the truth is, I do like skirts. A lot. For a very long time, I thought I didn’t, but then I realised it’s not the skirts that I don’t like - it’s more the fact that most commercial skirts out there don’t meet my requirements. Not to mention the many societal excpectations that come when one wears a skirt (for the record, societal expectations can go !@£%@£$^$£^b themselves).
I always wear skirts with leggings underneath, because that’s more comfortable - I never learnt to sit “ladylike”, as my grandmother calls it, and I’m not planning to start now (there is a very long, feminist rant about why I don’t want to learn how to “sit properly”, but the tl;dr; version of it is that “sitting properly” encourages women to make themselves physically small and relinquish space to everybody else around them, regardless of their own comfort, and I’m just not up for that). Also, I’m on the large side, and having cotton leggings under a skirt makes it more comfortable to walk - chaffing is a real problem! So, when I look at patterns for skirts, that’s always my question: will this look good with leggings underneath? Will the waistband sit comfortably when I wear leggings under it? The answer, with most commercial skirts, is often no.
The other problem I have with skirts is the lack of pockets. Yes, women do carry handbags - but that’s because most clothing aimed at us has no pockets, or fake pockets, or pockets where one can fit about one ant, and only if it’s not too big. For comparison, my partner has an iPhone 6s Plus (the large one, just under 16cm by 8 cm in dimensions), and it fits perfectly in the pockets of all his jeans. I have an iPhone X (just over 14cm by 7cm in dimensions), and it doesn’t fit in most of my pockets. Or fits, but only in one specific position, on days of the week where the planets are aligned. I’m sure you get the idea. So, the other thing I look for when I am making patterns is pockets. All the pockets. Everywhere.
Rebecca Page, turns out, seems to share my desire to have pockets in garments. Most of her stuff has pockets, and she also released a Pocket Add On that provides patterns and instructions on how to make and add a variety of patch pockets. But for most of her patterns, you don’t even need that, because it comes with pockets already!
So, no surprise that I fell in love with the Arabella skirt when I saw it. As all her patterns, its sizing is very inclusive (I’m a size 20-22 on most ready to wear, and a 3XL on her patterns, which go up to 5XL). As with most of her skirts, it comes with a variety of options in terms of length (from above the knee short, to floor length), and of waistbands (tall, or regular). And, like all her patterns, it has a very detailed set of instructions that don’t assume you know what a french seam is, or how to gather a skirt. Win!
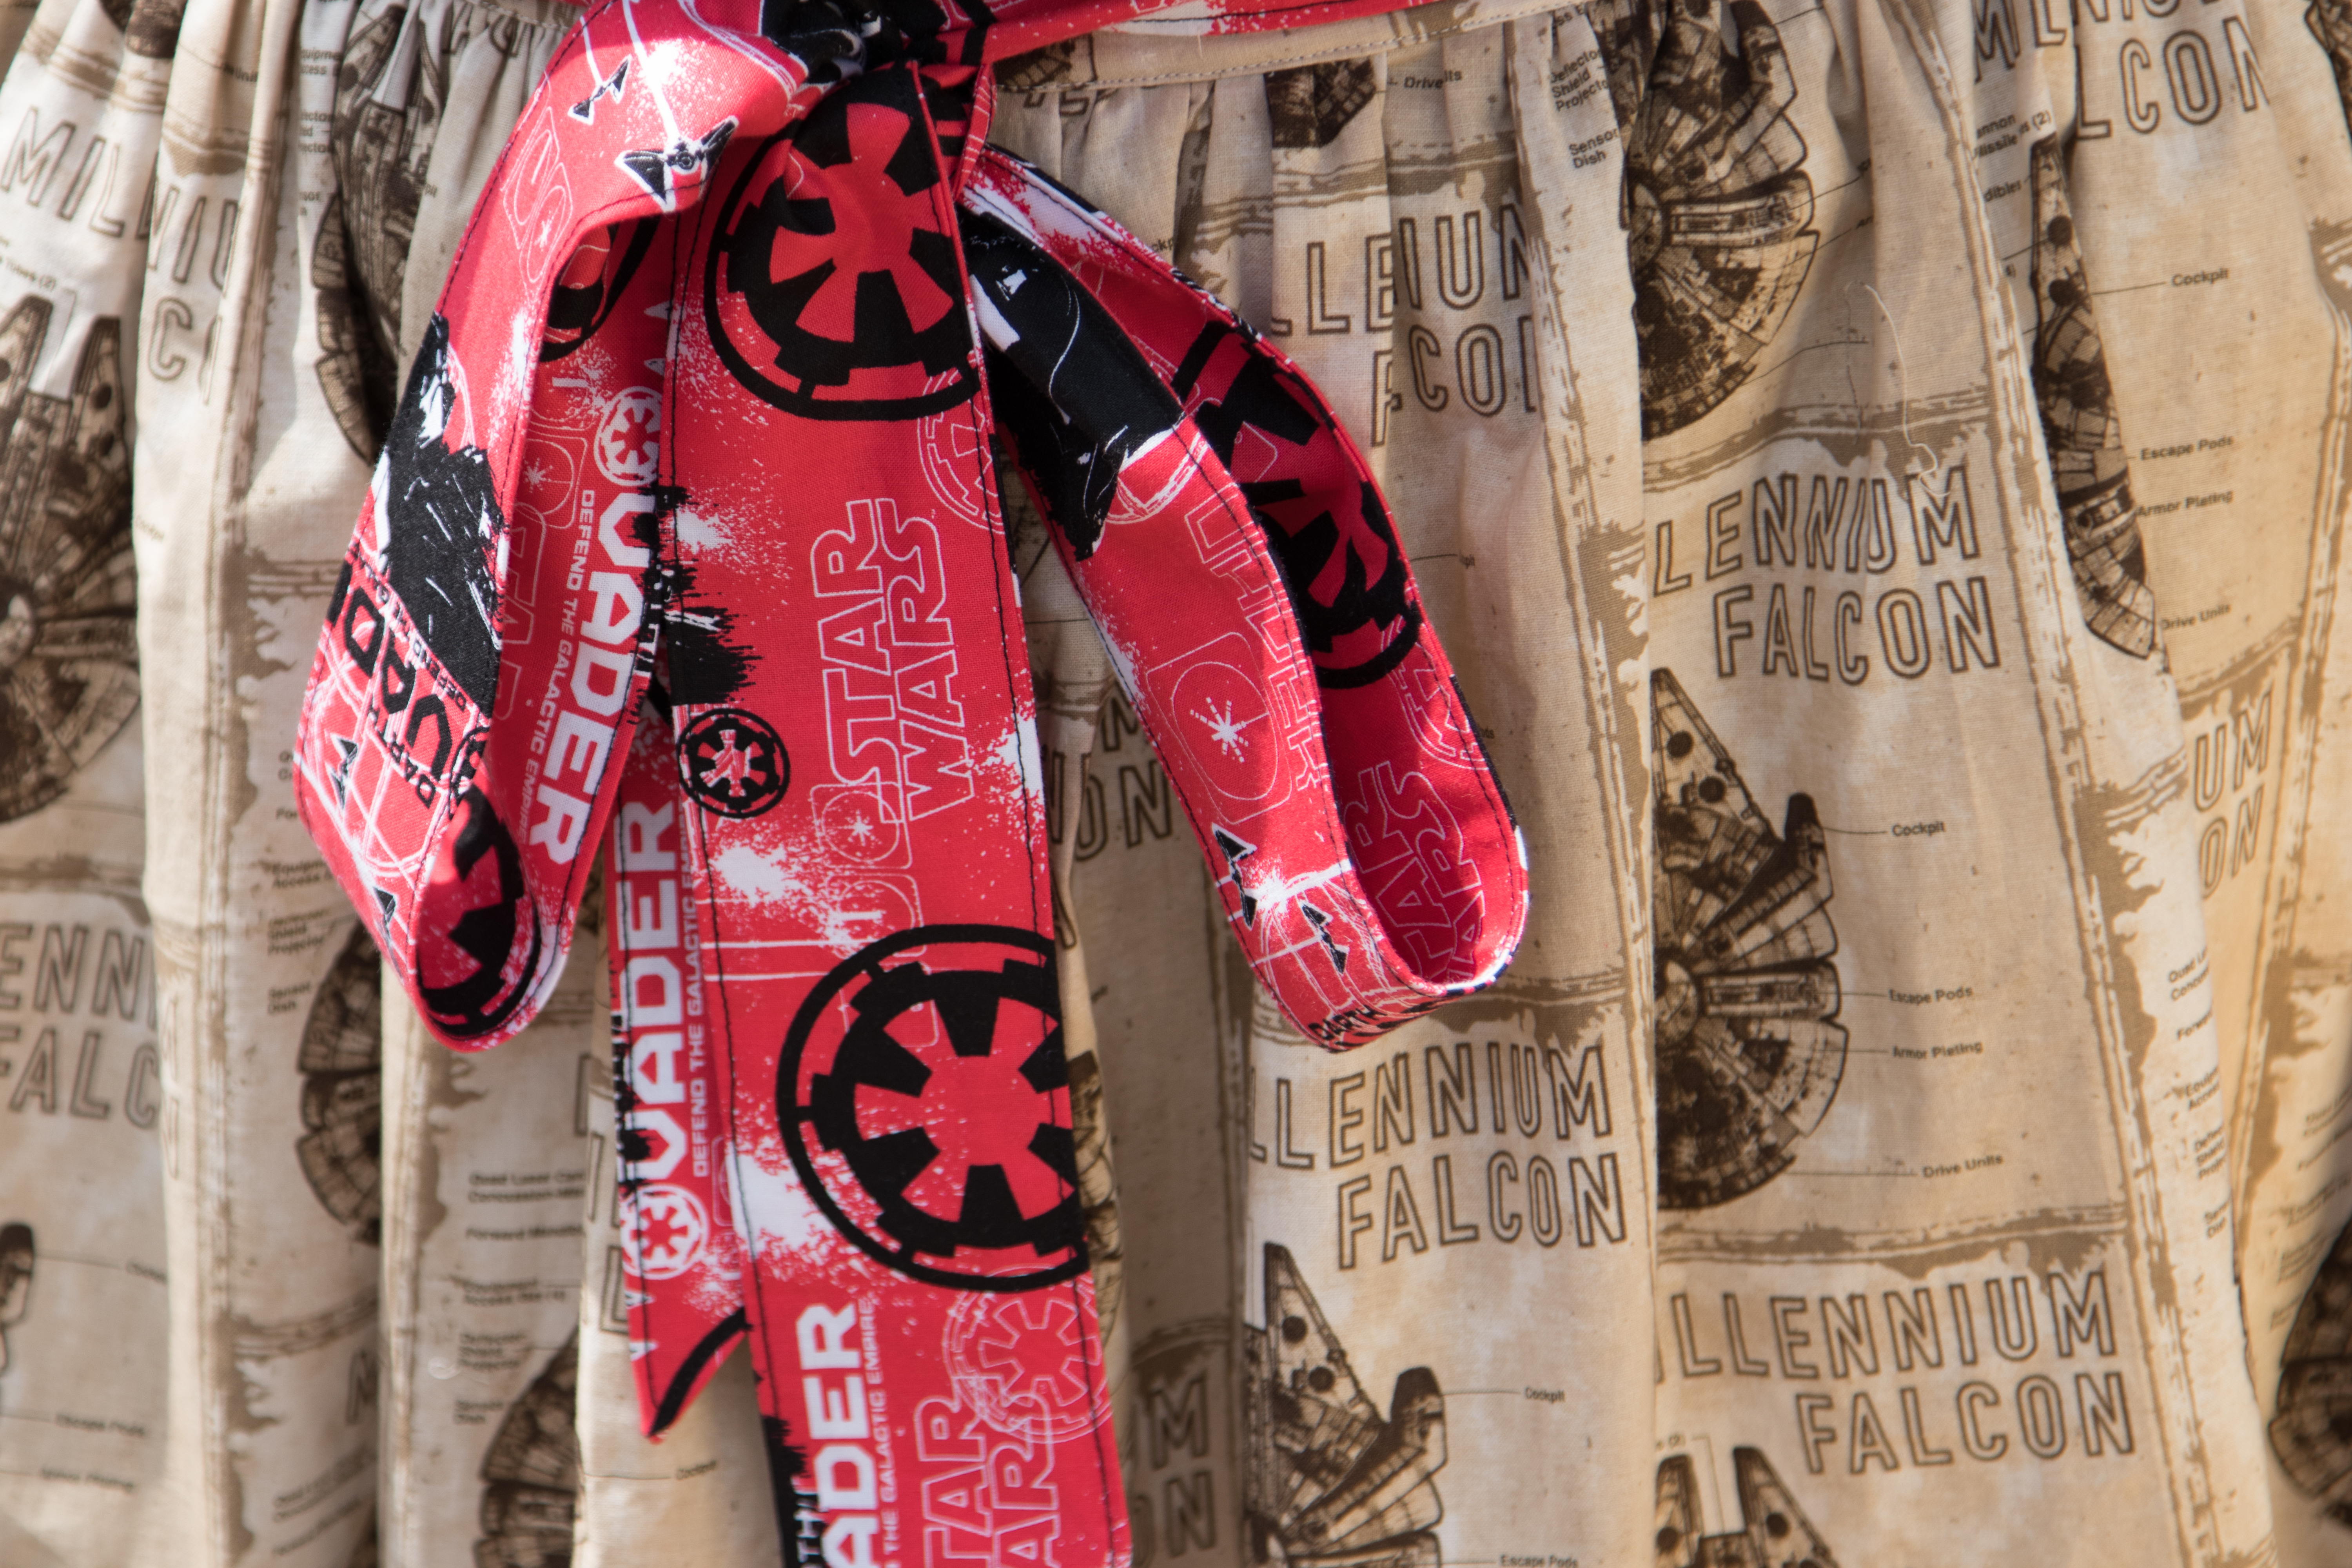
I spent a very long time trying to find the right fabric for it, and I eventually found it at Sunnyside fabrics. It’s obviously geeky, but hey, I’m a geek and proud of it.
I also managed to come across some lovely contrasting fabric that I could use for the sash, which continues the Star Wars theme, but gives a colour accent...

Initially, I wasn’t sure whether to make the 3XL or the 4XL size. A previous skirt (the Paris Skirt) came out a bit too tight on the 3XL, but only a smidgen. And, the Arabella has an elasticated waist, so I took the plunge and went for the 3XL. Turns out this one could be a smidgen tighter, but, again, it’s only a smidgen.
I was also not sure what length to make. I tend to gravitate towards floor length skirts, but I’ve come to realise that’s just cos I can hide under them - and I’m a bit tired of hiding. Also, it’s been really warm out there, and I found myself wanting to shorten some of my skirts to better cope with the heat. However, I wasn’t sure I wanted to go as short as “above the knee”, so I compromised by folding the pattern so that the cut line is between the “above the knee” (19.75 inches) and “below the knee” (23.75 inches) lengths. That seems to have done the trick, and I can always shorten it later. Will do the same again,if when I make it again...

WhatI really want to do would make the skirt look better, if I could be bothered to do it, is accounting for the fact that, thanks to a combination of my body dimensions and where I like the waistbands to sit, I tend to wear the front of the skirt slightly lower than the back, which makes the hem look skewed if you look at me from the side. So next time I may use the lovely 18th century method of “taking it from the top” to adjust that, so that the front waistband is a bit lower than the back, and the hem looks even. That’d require a helping hand to pin a current skirt, so I can see what shape I need to take from the top of any future skirts.
I opted for the tall waistband, which takes two lengths of elastic. I probably would be more comfortable with the shorter option, which only takes one length of elastic. This may also make the “take it from the top” adjustments simpler to make.

The main problem I had was that some pattern pieces were too long to cut on the width of the fabric (which was 45” wide), so I had to split the front and back of the skirt in two, and do two additional seams. The bonus of that is that I didn’t need to find the quarter points of the skirt when adding the waistband - because they were already there, in all the seams.

The sash, however, I left full width of the fabric, rather than making it the length the pattern called for - better use of fabric, and all that. I made the angled end for it, and I did topstich it after turning it. I want to make one without the sash, because sashes sometimes annoy me, but I think the splash of colour looks very good on it. And it can be tied at the front, or at the back!

The skirt is constructed with french seams throughout, which I really like. Well, I really dislike when I’m making them, cos they need to be sewn twice, but I really appreciate from the point of view of finishing and of durability of the garment. It is, after all, one of the reason why most 18th century garments that were designed to be worn daily use flat-felled seams that encase the raw edges: saves time on the finishing, and makes the item last longer (which you did need, back when there wasn’t a handy shop to pop by and you needed to sew all your own clothes by hand).

Overall, the skirt is very comfortable, and I think it’ll be worn until it falls to pieces.
As usual, the pattern is very well written, and the instructions are very detailed. I recommend always reading the entirety of the step instructions before proceeding, because there are often a lot of tips and tricks included that help make things easier.
Photos courtesy of my partner, Tim Mitchell. You can find some more of his work here
I always wear skirts with leggings underneath, because that’s more comfortable - I never learnt to sit “ladylike”, as my grandmother calls it, and I’m not planning to start now (there is a very long, feminist rant about why I don’t want to learn how to “sit properly”, but the tl;dr; version of it is that “sitting properly” encourages women to make themselves physically small and relinquish space to everybody else around them, regardless of their own comfort, and I’m just not up for that). Also, I’m on the large side, and having cotton leggings under a skirt makes it more comfortable to walk - chaffing is a real problem! So, when I look at patterns for skirts, that’s always my question: will this look good with leggings underneath? Will the waistband sit comfortably when I wear leggings under it? The answer, with most commercial skirts, is often no.
The other problem I have with skirts is the lack of pockets. Yes, women do carry handbags - but that’s because most clothing aimed at us has no pockets, or fake pockets, or pockets where one can fit about one ant, and only if it’s not too big. For comparison, my partner has an iPhone 6s Plus (the large one, just under 16cm by 8 cm in dimensions), and it fits perfectly in the pockets of all his jeans. I have an iPhone X (just over 14cm by 7cm in dimensions), and it doesn’t fit in most of my pockets. Or fits, but only in one specific position, on days of the week where the planets are aligned. I’m sure you get the idea. So, the other thing I look for when I am making patterns is pockets. All the pockets. Everywhere.
Rebecca Page, turns out, seems to share my desire to have pockets in garments. Most of her stuff has pockets, and she also released a Pocket Add On that provides patterns and instructions on how to make and add a variety of patch pockets. But for most of her patterns, you don’t even need that, because it comes with pockets already!
So, no surprise that I fell in love with the Arabella skirt when I saw it. As all her patterns, its sizing is very inclusive (I’m a size 20-22 on most ready to wear, and a 3XL on her patterns, which go up to 5XL). As with most of her skirts, it comes with a variety of options in terms of length (from above the knee short, to floor length), and of waistbands (tall, or regular). And, like all her patterns, it has a very detailed set of instructions that don’t assume you know what a french seam is, or how to gather a skirt. Win!
I spent a very long time trying to find the right fabric for it, and I eventually found it at Sunnyside fabrics. It’s obviously geeky, but hey, I’m a geek and proud of it.

I also managed to come across some lovely contrasting fabric that I could use for the sash, which continues the Star Wars theme, but gives a colour accent...

Initially, I wasn’t sure whether to make the 3XL or the 4XL size. A previous skirt (the Paris Skirt) came out a bit too tight on the 3XL, but only a smidgen. And, the Arabella has an elasticated waist, so I took the plunge and went for the 3XL. Turns out this one could be a smidgen tighter, but, again, it’s only a smidgen.
I was also not sure what length to make. I tend to gravitate towards floor length skirts, but I’ve come to realise that’s just cos I can hide under them - and I’m a bit tired of hiding. Also, it’s been really warm out there, and I found myself wanting to shorten some of my skirts to better cope with the heat. However, I wasn’t sure I wanted to go as short as “above the knee”, so I compromised by folding the pattern so that the cut line is between the “above the knee” (19.75 inches) and “below the knee” (23.75 inches) lengths. That seems to have done the trick, and I can always shorten it later. Will do the same again,

What
I opted for the tall waistband, which takes two lengths of elastic. I probably would be more comfortable with the shorter option, which only takes one length of elastic. This may also make the “take it from the top” adjustments simpler to make.
The main problem I had was that some pattern pieces were too long to cut on the width of the fabric (which was 45” wide), so I had to split the front and back of the skirt in two, and do two additional seams. The bonus of that is that I didn’t need to find the quarter points of the skirt when adding the waistband - because they were already there, in all the seams.

The sash, however, I left full width of the fabric, rather than making it the length the pattern called for - better use of fabric, and all that. I made the angled end for it, and I did topstich it after turning it. I want to make one without the sash, because sashes sometimes annoy me, but I think the splash of colour looks very good on it. And it can be tied at the front, or at the back!

The skirt is constructed with french seams throughout, which I really like. Well, I really dislike when I’m making them, cos they need to be sewn twice, but I really appreciate from the point of view of finishing and of durability of the garment. It is, after all, one of the reason why most 18th century garments that were designed to be worn daily use flat-felled seams that encase the raw edges: saves time on the finishing, and makes the item last longer (which you did need, back when there wasn’t a handy shop to pop by and you needed to sew all your own clothes by hand).

Overall, the skirt is very comfortable, and I think it’ll be worn until it falls to pieces.
As usual, the pattern is very well written, and the instructions are very detailed. I recommend always reading the entirety of the step instructions before proceeding, because there are often a lot of tips and tricks included that help make things easier.
Photos courtesy of my partner, Tim Mitchell. You can find some more of his work here
Bean bags!
Jul. 21st, 2018 06:31 pm My partner is into photography - he does pretty much all the photographing of stuff I make. We’ve recently both gotten into birdwatching, so he got one of those ridiculously long lenses that enables him to get amazing photos of birds in the distance. Obviously those things are heavy, and need to be kept still to get sharp photos. So he asked for a bean bag he could use when we are in some of the hides in various wetlands we’ve been visiting.
A bit of googling led me to this, which looked the part, and included detailed instructions. As usual, I didn’t quite follow them to the letter, but hey, that’s me.
The main fabric was recycled from one leg of an old pair of jeans of mine. I had to unpick one of the seams to get the 8.5 inches needed for one of the pieces - but that was easier than I expected!
For the zip, I used this trick to make a nice welt pocket, rather than just cut and fold back. I used some leftover fabric from a set of pyjamas to make the facing for the “pocket”. The zip and the flap were added mostly as described in the instructions - next time I may do a covered zip (either single flap, or double welt). I also used the same leftover fabric to reinforce the stitching that joins the two sides of the bean bag and to make the flap that covers the slit between them (which also used up some of the leftover thick interfacing I had).
Overall, the instructions are very detailed, and although there are a few things I changed because my sewing self wouldn’t let me “just wing it because it’s on the inside”, the result seems pretty good.
Underwear!
Jun. 23rd, 2018 07:24 pmSo, I finally got back to doing some sewing, and made some underwear. I made a pair of Stitch Upon A Time Scrundlewear, size 3XL boy shorts with encased elastic high waistband and leg bands. They are mighty comfortable, at least for lounging around the house. I’m going to have to wear them for a while and then decide what other versions I want to make. Or whether to make a cami of the same fabric...
I also made my partner a pair of Stitch Upon A Time Men’s Boxers, size XL with an XXL waistband - I meant to make XXL entirely but I cut the wrong size and didn’t notice until I got to the waistband. Luckily I could fudge it! Options: short legs, hemmed, low rise, knitted waistband, with fly. Again, they’ll need testing and other variations may be made - I have some more of that fabric left, as well as a metre of another fabric to also use for this.
I’m also making progress with my first set of petticoats for my 18th century outfit. I have done the cutting (about 88 cm, so it looks like the lenght of the Arabella skirt I want to make is about right, which I thought it wasn’t!), pleating, seams on the sides and tidying up of the slits. I need to finish the waistbands, but I’m knackered and have an early start tomorrow.
Paris skirt
Mar. 6th, 2018 08:02 pmSo, as some of you may have noticed, I have fallen in love with patterns by Rebecca Page. You can find her work here.
My latest make from her patterns is the Paris Skirt. I made a size 3XL, with sewn-down pleats, somewhere between tea length and knee length. I could have done with a 4XL, but that would have been a bit too big, I think.
I made it in a lovely taffeta - only polyester, but seems very easy to care for. I have about half a metre left from the original purchase, and I bought a further 1.20m when I went back to the shop today (they are closing down at some point “soon”, so I thought I’d buy what was left of the roll!). Now I need to find a pattern for a top that can be made in woven fabric - the Paris top requires knitted fabric.
Cables, yarn consumption, and jumpers
Jan. 16th, 2018 06:07 pmAmazing how much cables change the consumption of yarn in a project.
I bought enough yarn when we visited New Lanark in July to make a jumper. Then I decided against making that one, because it is worked in pieces and then sewn together, and I don’t like sewing knitwear.
So I picked another one to make. Kate Davies’ Port o’ Leith, which I’ve been meaning to make for ages.
Turns out I used less than half the yarn I bought (6 skeins out of 13) for that. I haven’t made the collar yet, but that should take just over one ball of it...
So I’m considering making another Owls jumper with the remaining 7 skeins, and leave the collars for later... I can always make that one with what’s left of the iris colourway of the yarn that I used to make the Sheperd’s hoodie.
Kingston jacket
Dec. 9th, 2017 05:41 pmSo, I seem to have fallen in love with Rebecca Page’s patterns. The ones I’ve made so far are wonderfully written. If you are experienced at this sewing lark, or like figuring things out, you can follow the one page cheat-sheet. If you are more of a novice, or, like me, you sew while watching telly or with only half a brain available, you’ll no doubt appreciate the very detailed pages and pages of instructions and many photos in every step.
The Kingston jacket is no different. The pattern walks you through flat fell seams (why do I make so many things with flat fell seams these days?), pockets, setting sleeves in the armscye, and pretty much every single thing you need to do. Bonus points for always stating which piece to put on top when sewing flat fell seams, so I didn’t have to figure that out every time.
I made the jacket with the standard long sleeves, with the optional front pockets and the side seam pockets.
Here’s the final result:
The full jacket:

The back, with the contrasting collar back

The side. Notice how the pockets are hiding?

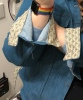
The cuffs, in contrasting fabric too.
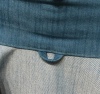
The all important hanging loop!
The fabric is lightweight stretch denim, which makes the sewing easier but still gives the jacket the right look and feel. It’s 7.5oz coloured denim from Empress Mills. I used contrasting fabric on the back of the collar, the inside of the cuffs, the inside of the tabs on the back and the side seam pockets.
I used topstitching thread on the top, which makes the flat fell seams look more the part. Buttons are plain jeans studs from Prym.
Things to remember the next time:
The Kingston jacket is no different. The pattern walks you through flat fell seams (why do I make so many things with flat fell seams these days?), pockets, setting sleeves in the armscye, and pretty much every single thing you need to do. Bonus points for always stating which piece to put on top when sewing flat fell seams, so I didn’t have to figure that out every time.
I made the jacket with the standard long sleeves, with the optional front pockets and the side seam pockets.
Here’s the final result:
The full jacket:

The back, with the contrasting collar back
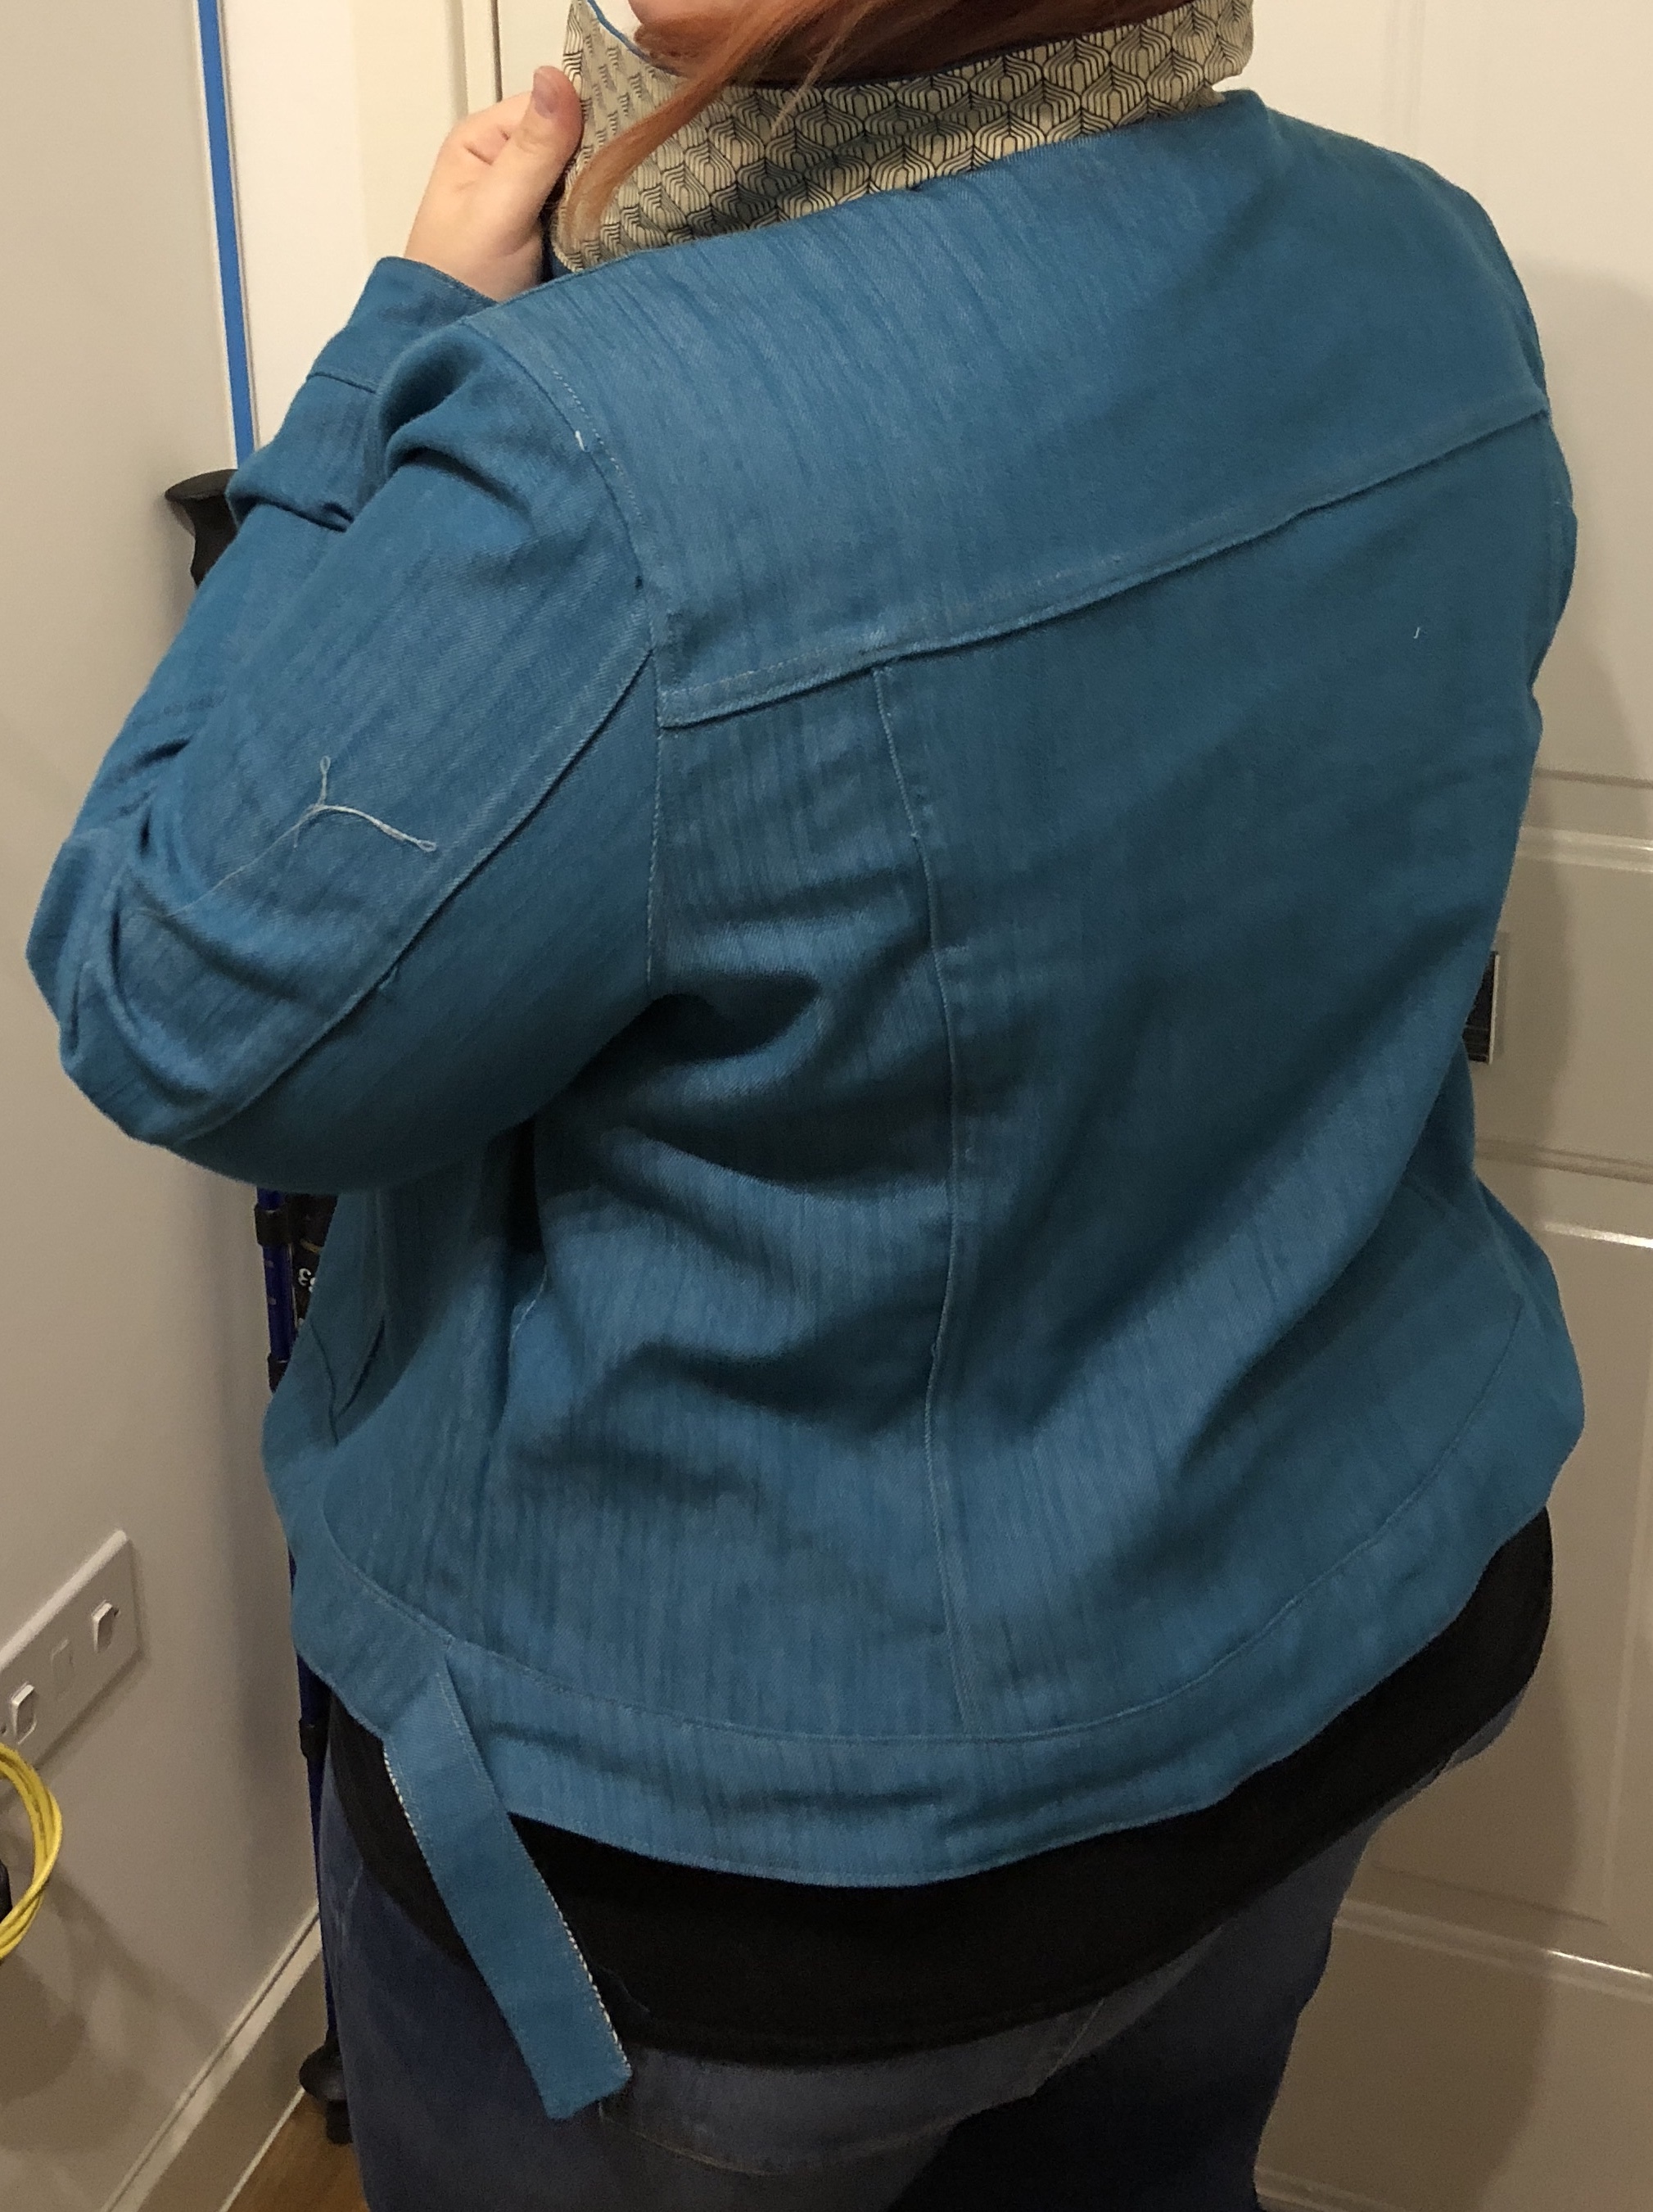
The side. Notice how the pockets are hiding?

The cuffs, in contrasting fabric too.

The all important hanging loop!

The fabric is lightweight stretch denim, which makes the sewing easier but still gives the jacket the right look and feel. It’s 7.5oz coloured denim from Empress Mills. I used contrasting fabric on the back of the collar, the inside of the cuffs, the inside of the tabs on the back and the side seam pockets.
I used topstitching thread on the top, which makes the flat fell seams look more the part. Buttons are plain jeans studs from Prym.
Things to remember the next time:
- When stitching the flat of the front pockets, it’s easier to baste/stitch that first, then do the flat fell seam on top. I learnt this the hard way.
- I made the wrong pockets! I meant to do the welt pockets and then inside pockets from the pattern add on, but I forgot. Oh well.
- It does pay to spend time aligning the sleeves. I managed to get one to match the seam on the sleeve to the seam on the back, but not the other.
- I’ll probably lengthen the pattern by about 10-15 cm. The jacket sits where denim jackets usually do, but I like my jackets longer.
18th century layers
Nov. 30th, 2017 12:06 pmSo, I said I’d post some photos of the current progress of my 18th century outfit...


The shift is based on the pattern/description provided by Marquise, and made on quite thick cotton fabric from IKEA of all places. It’s cotton, so not entirely period appropriate (it should have been linen). And it’s heavy, so again not quite appropriate for a shift, but hey, it’s cold here, okay? Don’t judge me. I’ll make one in lovely lightweight cotton at some point, and entirely ignore the linen thing for now.
The neckline is still in progress in that photo. I cut the 1750s era one (more or less) described here, and it seems to work with the stays. Further photos to follow.
The stays as from J.P. Ryan. The inner layer is cotton drill, the linin is lightweight cotton I had leftover from a summer dress, and the cover is a linen-look cotton from Minerva Fabrics. The binding is made from the cover fabric, and I added straw coloured ribbon on the top binding (will redo that, so that it looks a bit neater) and on some seams (will do other seams as and when - handsewing is slow). For the two front pieces of the cover, I did use a double layer of the drill and the cover fabric, because why not give it more structure. The boning is synthetic whalebone / German plastic boning, which is a wonderful thing to work with.
If I make this pattern again, I am so moving the boning channels. Having to close some of the channels with the binding around the tabs was a pain, so I’m not doing that again... But I do like the way it does the the separation of horizontal and vertical boning channels on the front.
Also, pattern came out too big on the bust, so I had to fudge it with the back piece (because I didn’t make a toile. Mea culpa). I had to fold back not following the line, but rather diagonally, with the point at the bottom being the point where the pattern instructed me to fold, and the point at the top being about 1cm further from the edge that what should have been the back bone further away from the edge. So quite a folding. But it works. Will fiddle with the pattern if I make it again.
The pockets were made with leftover fabric from the shift and twill tape. No embroidery cos I’m going for a very plain, not high status look (because I don’t want to make a robe just yet!). Need to reposition them cos I put them together before I had the stays.
Next in the list: finish off the neckline on the shift, reposition the pockets. And start with the petticoats, in the same material as the shift.
Other crafts!
Nov. 30th, 2017 11:57 amSo, it’s been a while. A long while.
Enough for me to pick up... well, quite a few other crafts.
So, this seems like a natural progression from knitting. I started spinning on a spindle, aaaaages ago after a visit to Cosmeston during a reenactment weekend. Then I got frustrated and gave up, but eventually got back to it. Two spindles later, I bought a spinning wheel, a lovely Ashford Joy. And now I have about a ton of fluff waiting to be spun. More on this on Ravelry, where I now can add spinning projects!
Yep. I have a loom. A 24” Kromski Harp Forte. Portable, foldable, lovely to use. My next challenge on this, once I finish the cotton table runner currently on it, is double weaving a blanket. More on this also on Ravelry where I can now add weaving projects!
This is totally my partner’s fault, because he bought me the sewing machine. And I seem to have taken to it like a duck to water. In under a year, I’ve made two summer dresses, a more wintery kirtle style dress, several pairs of loungewear bottoms for both my partner and myself (I think it’s two pairs of long ones, two pairs of shorts ones for him, two pairs of long ones for me, and a third one is cut and waiting to be sewn), and have started the journey of a proper 18th century outfit (so far I have a shift, a pair of stays and pockets - bum roll and petticoats coming soon).
I’ll try to put some photos of some of the stuff I’ve made at some point. And to keep this updated more frequently...
Enough for me to pick up... well, quite a few other crafts.
Spinning
So, this seems like a natural progression from knitting. I started spinning on a spindle, aaaaages ago after a visit to Cosmeston during a reenactment weekend. Then I got frustrated and gave up, but eventually got back to it. Two spindles later, I bought a spinning wheel, a lovely Ashford Joy. And now I have about a ton of fluff waiting to be spun. More on this on Ravelry, where I now can add spinning projects!
Weaving
Yep. I have a loom. A 24” Kromski Harp Forte. Portable, foldable, lovely to use. My next challenge on this, once I finish the cotton table runner currently on it, is double weaving a blanket. More on this also on Ravelry where I can now add weaving projects!
Sewing
This is totally my partner’s fault, because he bought me the sewing machine. And I seem to have taken to it like a duck to water. In under a year, I’ve made two summer dresses, a more wintery kirtle style dress, several pairs of loungewear bottoms for both my partner and myself (I think it’s two pairs of long ones, two pairs of shorts ones for him, two pairs of long ones for me, and a third one is cut and waiting to be sewn), and have started the journey of a proper 18th century outfit (so far I have a shift, a pair of stays and pockets - bum roll and petticoats coming soon).
I’ll try to put some photos of some of the stuff I’ve made at some point. And to keep this updated more frequently...
So, I finally got around to knitting Kate Davies' Owls jumper, which I have been staring at with envy for months now.
I have to say, I love it! The pattern is very clear and easy to follow - although I did tweak a couple of things here and there, but then again when don't I? And the result is amazing! The owls look beautiful even without the buttons.
Photos can be found on my Ravelry project, for now.
Now, what to do next? Paperdolls? Or Boreal?
Trying out the Mucklemuff
Jan. 18th, 2013 08:48 pm So, it's snowing. Or it has been, for most of today. After a very cold day on Wednesday (when I last walked to work), I complained all my mittens / gloves / two-way mittens were thumbless, so my thumbs got very cold on the way to work, but I didn't have time to make my next planned set of mittens (Kate Davies's SnawPaws) before the weather turns warm again.
Then I remembered I spent Christmas knitting a Muclemuff (and complaining that the weather wasn't cold enough to wear it, of course). So this morning, I took it out with me.
I can now safely say that 100g of eider wool top and two layers (or three, if you count the floats) of Wool of the Andes keep your hands toasty and warm like nothing I've ever worn. And the wristloop means I can easily let go of it when I start stumbling in the snow.
All in all, I'm very glad I knitted it! :)
What I've been knitting over Christmas
Dec. 31st, 2012 10:52 am So, I've been a busy bee this Christmas, and have worked on a lot of projects.
I did finish the "I'm a little teapot" teapot cosy, which, by the way, doe the job admirably. A bit unnerving to cut the steaks without any reinforcement, but Shetland wool does indeed hold very nicely when doing so. I think I might be ready to try a more complex piece of fair isle, maybe a vest or jumper in Shetland wool. Whenever I can afford the wool, and have room in the house for it.
I started the Mucklemuff on Boxing Day and finished it on Saturday, after the merino wool top I needed for the filling arrived. I seem to have fallen in love with stranded colourwork! And I do really like the Knitpick's Wool of the Andes I used for it. Might use it for the Boreal jumper I'm planning to make at some point.
I also finished the Robin Hood stole, the latest Unique Sheep knitalong. I came out a bit shorter than I was expecting, I think my gauge has gotten a lot tighter than it used to be. I probably should have done it on a larger needle size, but hey ho. It's finished now, and I have a lo of yarn left over.
So, I'm using the leftovers to make Verdandi, another of the Three Norns shawls. I want to use up all the yarn, so I'm making it bigger than the pattern calls for, which is taking some careful repeating of charts so that things still align when I move from one chart to the next.
i have also started the Winter Wonderland scarf that came as part of the Unique Sheep Christmas package. Cables, cables and more cables! I don't really like making cables, but this yarn is so soft and the colourway is so pretty I think I'll be making an exception for it!
So, yeah, busy me...
Tir Chonaill - done!
Dec. 26th, 2012 11:52 pm Well. That was fun. And easier than I expected it to be. Once I got my left hand to play ball so I could knit the pattern colour continental style, that was it! It took a lot less time to knit the blanket than I expected, but that's the beauty of bulky yarns, I guess.
Cutting the steek was still nervewracking, though. Luckily, it held, and the sandwich does indeed hide the steek edges very nicely. I hope it will continue to hold. And I was reminded of just how much I hate doing i-cord cast off - it takes ages, and about half a ball of yarn... But hey, it looks good now that it's finished.
I have since done more colourwork in the form of a little teapot cozy (this pattern, if you are interested), which was also my first piece of work with Shetland wool (yes, the teapot gets the good yarn, so what?). And now I'm knitting Kate Davies's Mucklemuff.
Gone from "can't do colourwork, wouldn't do it properly" to "what else can I knit that is colourwork?"...
Modified drop shoulder jumper - done!
Nov. 6th, 2012 09:31 pm I have finished the jumper! :D I'm incredible proud of it. And it didn't take as long as I thought it might :D
Putting the zip in was pretty straightforward, even if it took quite some time to sew it in because I'm a bit slow at sewing.
I'll see if I can post pictures at some point...
Putting the zip in was pretty straightforward, even if it took quite some time to sew it in because I'm a bit slow at sewing.
I'll see if I can post pictures at some point...
I have finished the body of the jumper. Now I'm waiting for my jumper dryer (one of those mesh things that can be put over the bath to dry jumpers and tshirts) to arrive, so I can wash the jumper before adding the collar. Hopefully it'll arrive tomorrow!
I have finished both sleeves of the jumper now, and I'm almost done with the body - I just need to knit about 2 more inches, which shouldn't take long. After that, it's all washing, blocking, waiting for it to dry and adding the collar.
The end is in sight! :D
The end is in sight! :D