Rebecca Page’s Arabella
Jul. 24th, 2018 09:33 pmSo, the truth is, I do like skirts. A lot. For a very long time, I thought I didn’t, but then I realised it’s not the skirts that I don’t like - it’s more the fact that most commercial skirts out there don’t meet my requirements. Not to mention the many societal excpectations that come when one wears a skirt (for the record, societal expectations can go !@£%@£$^$£^b themselves).
I always wear skirts with leggings underneath, because that’s more comfortable - I never learnt to sit “ladylike”, as my grandmother calls it, and I’m not planning to start now (there is a very long, feminist rant about why I don’t want to learn how to “sit properly”, but the tl;dr; version of it is that “sitting properly” encourages women to make themselves physically small and relinquish space to everybody else around them, regardless of their own comfort, and I’m just not up for that). Also, I’m on the large side, and having cotton leggings under a skirt makes it more comfortable to walk - chaffing is a real problem! So, when I look at patterns for skirts, that’s always my question: will this look good with leggings underneath? Will the waistband sit comfortably when I wear leggings under it? The answer, with most commercial skirts, is often no.
The other problem I have with skirts is the lack of pockets. Yes, women do carry handbags - but that’s because most clothing aimed at us has no pockets, or fake pockets, or pockets where one can fit about one ant, and only if it’s not too big. For comparison, my partner has an iPhone 6s Plus (the large one, just under 16cm by 8 cm in dimensions), and it fits perfectly in the pockets of all his jeans. I have an iPhone X (just over 14cm by 7cm in dimensions), and it doesn’t fit in most of my pockets. Or fits, but only in one specific position, on days of the week where the planets are aligned. I’m sure you get the idea. So, the other thing I look for when I am making patterns is pockets. All the pockets. Everywhere.
Rebecca Page, turns out, seems to share my desire to have pockets in garments. Most of her stuff has pockets, and she also released a Pocket Add On that provides patterns and instructions on how to make and add a variety of patch pockets. But for most of her patterns, you don’t even need that, because it comes with pockets already!
So, no surprise that I fell in love with the Arabella skirt when I saw it. As all her patterns, its sizing is very inclusive (I’m a size 20-22 on most ready to wear, and a 3XL on her patterns, which go up to 5XL). As with most of her skirts, it comes with a variety of options in terms of length (from above the knee short, to floor length), and of waistbands (tall, or regular). And, like all her patterns, it has a very detailed set of instructions that don’t assume you know what a french seam is, or how to gather a skirt. Win!
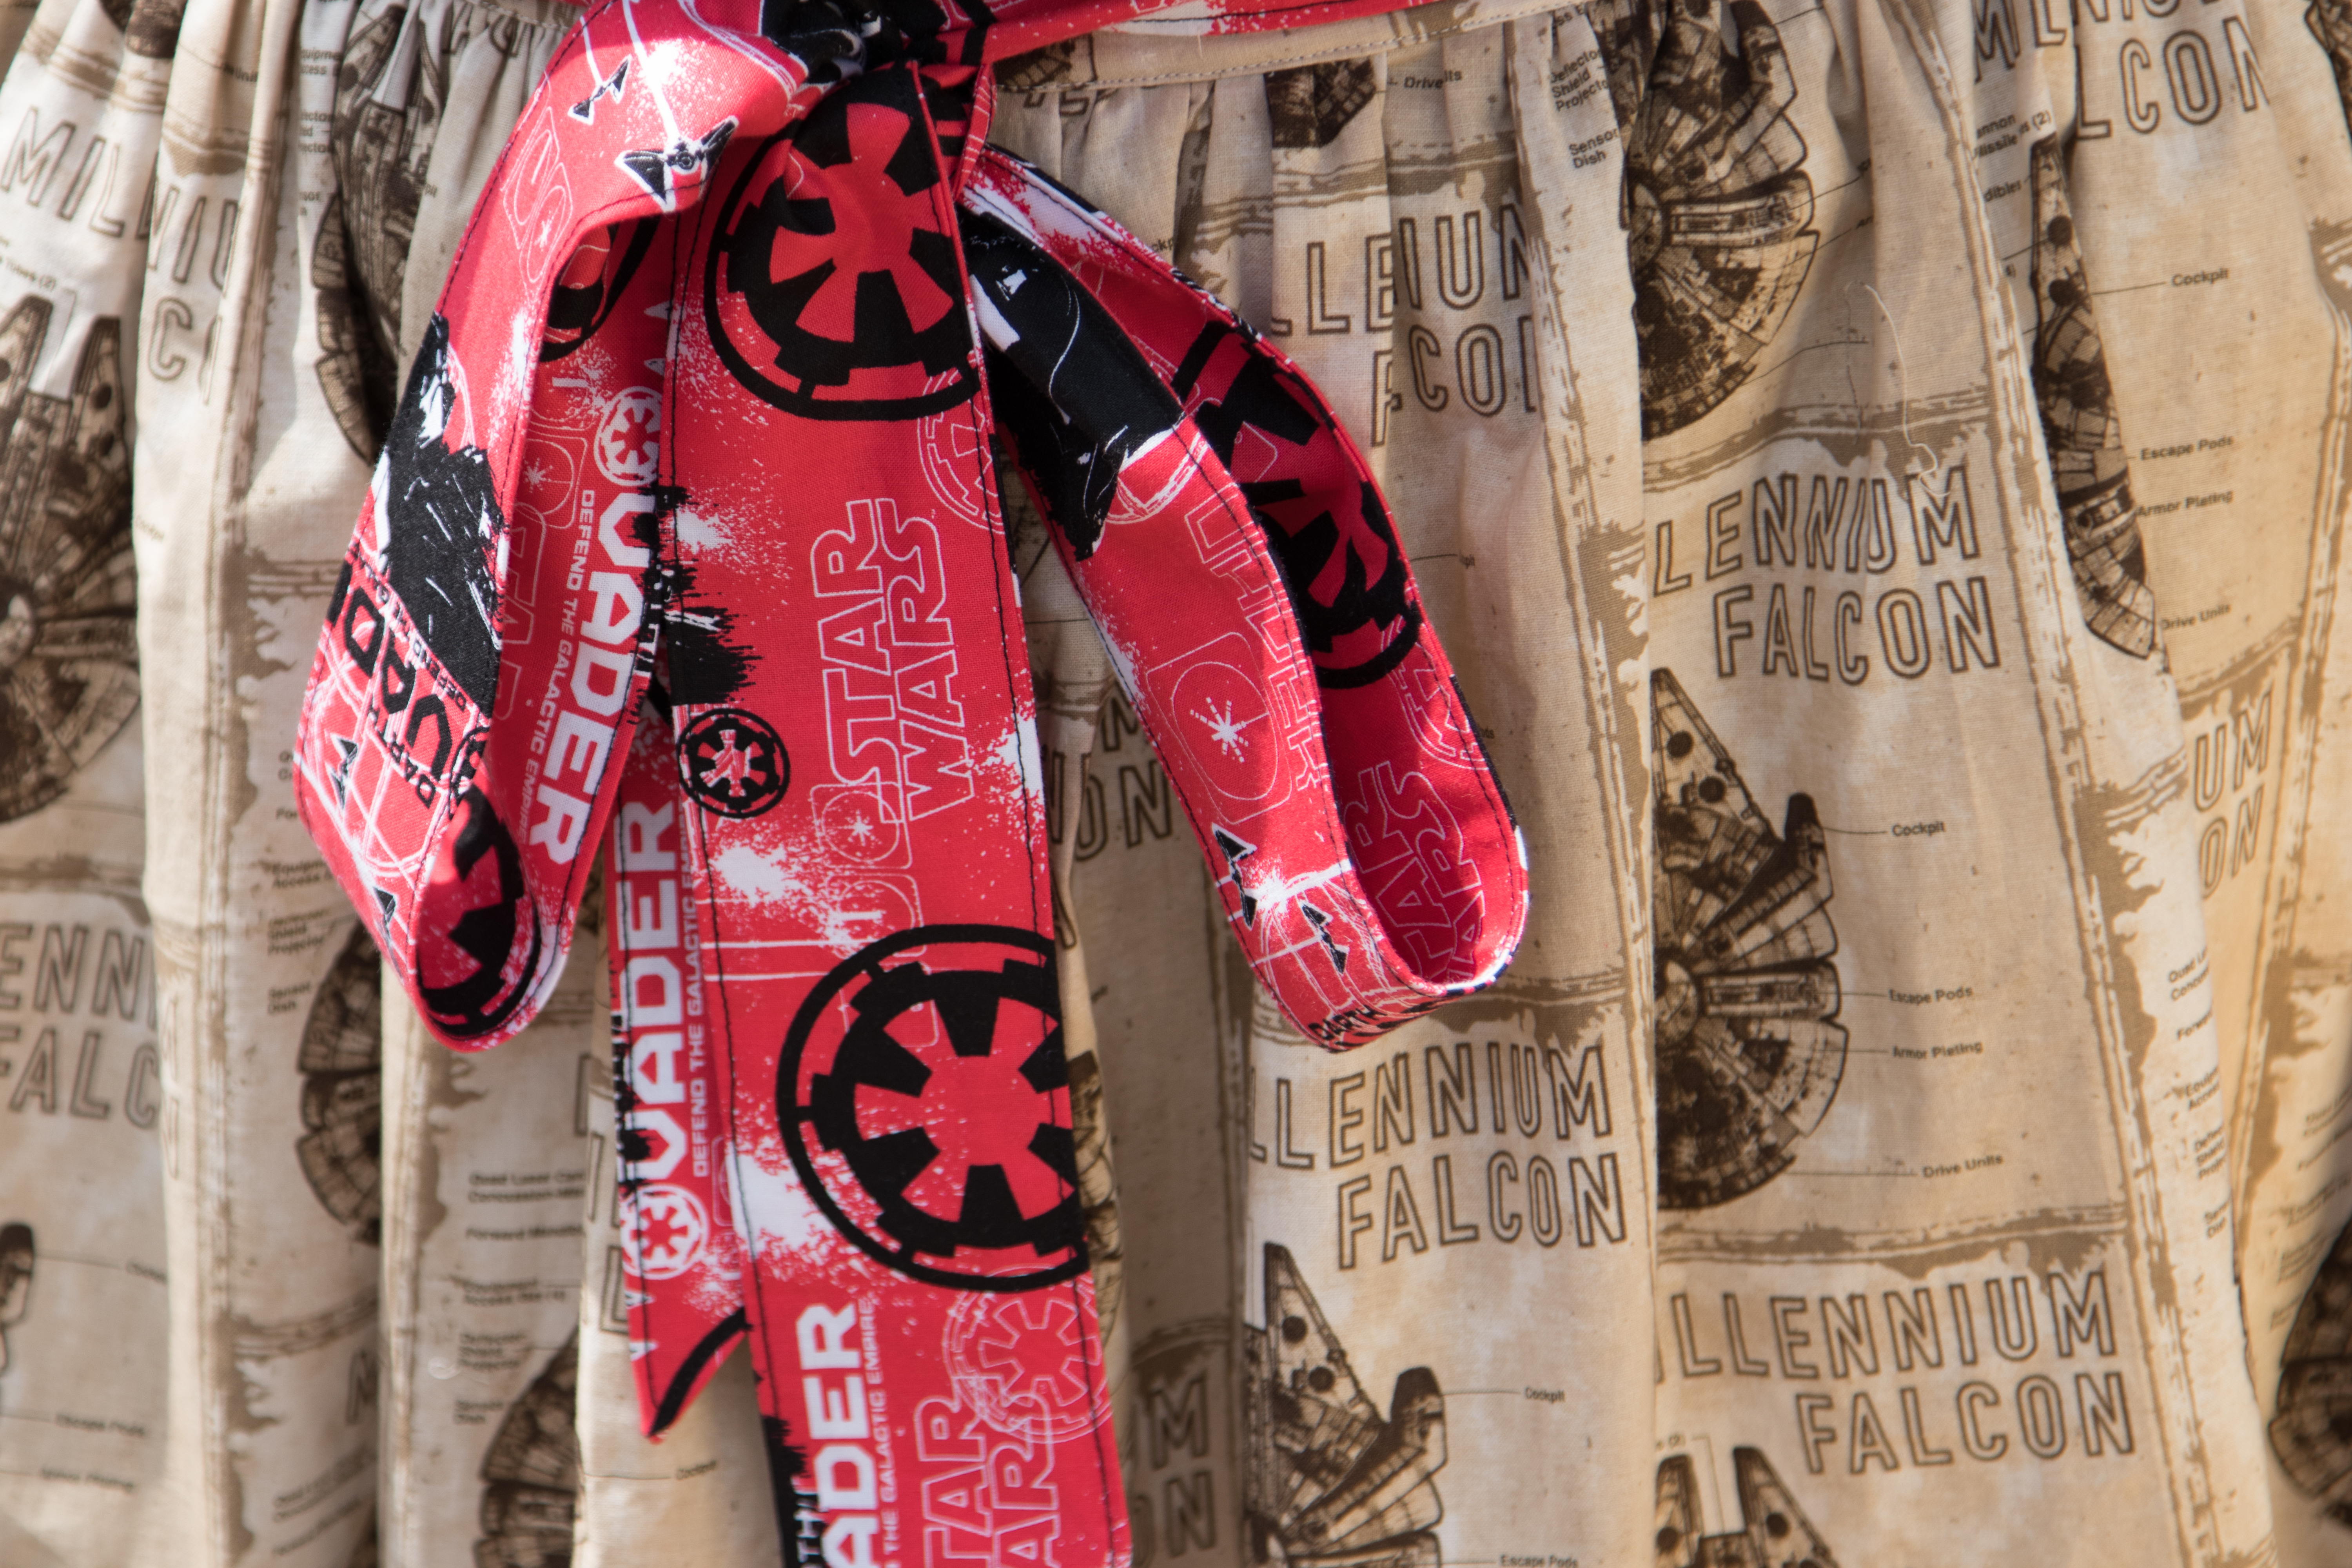
I spent a very long time trying to find the right fabric for it, and I eventually found it at Sunnyside fabrics. It’s obviously geeky, but hey, I’m a geek and proud of it.

I also managed to come across some lovely contrasting fabric that I could use for the sash, which continues the Star Wars theme, but gives a colour accent...

Initially, I wasn’t sure whether to make the 3XL or the 4XL size. A previous skirt (the Paris Skirt) came out a bit too tight on the 3XL, but only a smidgen. And, the Arabella has an elasticated waist, so I took the plunge and went for the 3XL. Turns out this one could be a smidgen tighter, but, again, it’s only a smidgen.
I was also not sure what length to make. I tend to gravitate towards floor length skirts, but I’ve come to realise that’s just cos I can hide under them - and I’m a bit tired of hiding. Also, it’s been really warm out there, and I found myself wanting to shorten some of my skirts to better cope with the heat. However, I wasn’t sure I wanted to go as short as “above the knee”, so I compromised by folding the pattern so that the cut line is between the “above the knee” (19.75 inches) and “below the knee” (23.75 inches) lengths. That seems to have done the trick, and I can always shorten it later. Will do the same again,if when I make it again...

WhatI really want to do would make the skirt look better, if I could be bothered to do it, is accounting for the fact that, thanks to a combination of my body dimensions and where I like the waistbands to sit, I tend to wear the front of the skirt slightly lower than the back, which makes the hem look skewed if you look at me from the side. So next time I may use the lovely 18th century method of “taking it from the top” to adjust that, so that the front waistband is a bit lower than the back, and the hem looks even. That’d require a helping hand to pin a current skirt, so I can see what shape I need to take from the top of any future skirts.
I opted for the tall waistband, which takes two lengths of elastic. I probably would be more comfortable with the shorter option, which only takes one length of elastic. This may also make the “take it from the top” adjustments simpler to make.

The main problem I had was that some pattern pieces were too long to cut on the width of the fabric (which was 45” wide), so I had to split the front and back of the skirt in two, and do two additional seams. The bonus of that is that I didn’t need to find the quarter points of the skirt when adding the waistband - because they were already there, in all the seams.

The sash, however, I left full width of the fabric, rather than making it the length the pattern called for - better use of fabric, and all that. I made the angled end for it, and I did topstich it after turning it. I want to make one without the sash, because sashes sometimes annoy me, but I think the splash of colour looks very good on it. And it can be tied at the front, or at the back!

The skirt is constructed with french seams throughout, which I really like. Well, I really dislike when I’m making them, cos they need to be sewn twice, but I really appreciate from the point of view of finishing and of durability of the garment. It is, after all, one of the reason why most 18th century garments that were designed to be worn daily use flat-felled seams that encase the raw edges: saves time on the finishing, and makes the item last longer (which you did need, back when there wasn’t a handy shop to pop by and you needed to sew all your own clothes by hand).

Overall, the skirt is very comfortable, and I think it’ll be worn until it falls to pieces.
As usual, the pattern is very well written, and the instructions are very detailed. I recommend always reading the entirety of the step instructions before proceeding, because there are often a lot of tips and tricks included that help make things easier.
Photos courtesy of my partner, Tim Mitchell. You can find some more of his work here
I always wear skirts with leggings underneath, because that’s more comfortable - I never learnt to sit “ladylike”, as my grandmother calls it, and I’m not planning to start now (there is a very long, feminist rant about why I don’t want to learn how to “sit properly”, but the tl;dr; version of it is that “sitting properly” encourages women to make themselves physically small and relinquish space to everybody else around them, regardless of their own comfort, and I’m just not up for that). Also, I’m on the large side, and having cotton leggings under a skirt makes it more comfortable to walk - chaffing is a real problem! So, when I look at patterns for skirts, that’s always my question: will this look good with leggings underneath? Will the waistband sit comfortably when I wear leggings under it? The answer, with most commercial skirts, is often no.
The other problem I have with skirts is the lack of pockets. Yes, women do carry handbags - but that’s because most clothing aimed at us has no pockets, or fake pockets, or pockets where one can fit about one ant, and only if it’s not too big. For comparison, my partner has an iPhone 6s Plus (the large one, just under 16cm by 8 cm in dimensions), and it fits perfectly in the pockets of all his jeans. I have an iPhone X (just over 14cm by 7cm in dimensions), and it doesn’t fit in most of my pockets. Or fits, but only in one specific position, on days of the week where the planets are aligned. I’m sure you get the idea. So, the other thing I look for when I am making patterns is pockets. All the pockets. Everywhere.
Rebecca Page, turns out, seems to share my desire to have pockets in garments. Most of her stuff has pockets, and she also released a Pocket Add On that provides patterns and instructions on how to make and add a variety of patch pockets. But for most of her patterns, you don’t even need that, because it comes with pockets already!
So, no surprise that I fell in love with the Arabella skirt when I saw it. As all her patterns, its sizing is very inclusive (I’m a size 20-22 on most ready to wear, and a 3XL on her patterns, which go up to 5XL). As with most of her skirts, it comes with a variety of options in terms of length (from above the knee short, to floor length), and of waistbands (tall, or regular). And, like all her patterns, it has a very detailed set of instructions that don’t assume you know what a french seam is, or how to gather a skirt. Win!
I spent a very long time trying to find the right fabric for it, and I eventually found it at Sunnyside fabrics. It’s obviously geeky, but hey, I’m a geek and proud of it.

I also managed to come across some lovely contrasting fabric that I could use for the sash, which continues the Star Wars theme, but gives a colour accent...

Initially, I wasn’t sure whether to make the 3XL or the 4XL size. A previous skirt (the Paris Skirt) came out a bit too tight on the 3XL, but only a smidgen. And, the Arabella has an elasticated waist, so I took the plunge and went for the 3XL. Turns out this one could be a smidgen tighter, but, again, it’s only a smidgen.
I was also not sure what length to make. I tend to gravitate towards floor length skirts, but I’ve come to realise that’s just cos I can hide under them - and I’m a bit tired of hiding. Also, it’s been really warm out there, and I found myself wanting to shorten some of my skirts to better cope with the heat. However, I wasn’t sure I wanted to go as short as “above the knee”, so I compromised by folding the pattern so that the cut line is between the “above the knee” (19.75 inches) and “below the knee” (23.75 inches) lengths. That seems to have done the trick, and I can always shorten it later. Will do the same again,

What
I opted for the tall waistband, which takes two lengths of elastic. I probably would be more comfortable with the shorter option, which only takes one length of elastic. This may also make the “take it from the top” adjustments simpler to make.
The main problem I had was that some pattern pieces were too long to cut on the width of the fabric (which was 45” wide), so I had to split the front and back of the skirt in two, and do two additional seams. The bonus of that is that I didn’t need to find the quarter points of the skirt when adding the waistband - because they were already there, in all the seams.

The sash, however, I left full width of the fabric, rather than making it the length the pattern called for - better use of fabric, and all that. I made the angled end for it, and I did topstich it after turning it. I want to make one without the sash, because sashes sometimes annoy me, but I think the splash of colour looks very good on it. And it can be tied at the front, or at the back!

The skirt is constructed with french seams throughout, which I really like. Well, I really dislike when I’m making them, cos they need to be sewn twice, but I really appreciate from the point of view of finishing and of durability of the garment. It is, after all, one of the reason why most 18th century garments that were designed to be worn daily use flat-felled seams that encase the raw edges: saves time on the finishing, and makes the item last longer (which you did need, back when there wasn’t a handy shop to pop by and you needed to sew all your own clothes by hand).

Overall, the skirt is very comfortable, and I think it’ll be worn until it falls to pieces.
As usual, the pattern is very well written, and the instructions are very detailed. I recommend always reading the entirety of the step instructions before proceeding, because there are often a lot of tips and tricks included that help make things easier.
Photos courtesy of my partner, Tim Mitchell. You can find some more of his work here